Posts

Showing posts with the label Grilling

BLT Hot Dog On The Grill

Image
Just like the name says, these are your classic grilled hot dogs with bacon, lettuce, tomato and topped with mayonnaise. Source...

The Story Behind Lookin' Ain't Cookin'

Image
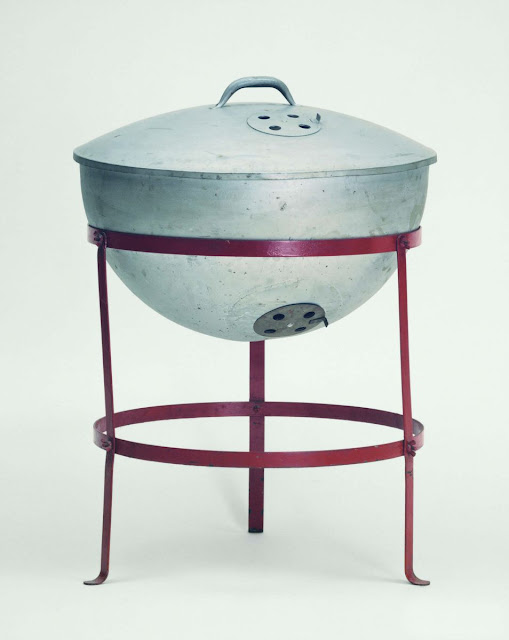
The feature that started a backyard revolution! When George Stephen designed the very first Weber grill back in 1952, one major feature that set his grill apart from virtually every other one sold at the time was the lid. Before George’s invention, if you bought a grill it would probably be what is known as an “open brazier”. Open brazier grills had no lid, and were hard to use if the conditions were anything less than perfect. Windy, rainy or snowy weather made grilling a challenge and George designed his grill to solve those very problems. His idea caught on and a backyard revolution had begun! Grilling on a Weber has always been about cooking with the lid closed. It’s a feature we’re proud of and one that’s always been one of the biggest draws of owning a Weber grill. For a flash from the past, check out this page from one of our 1960’s brochures and you’ll see the secret to grilling on a Weber has always been about the lid! Source...

Rotisserie Onions

Rotisserie Onions Ingredients 1 or more medium (8 ounce) onions, about the size of your fist. Root and stem end trimmed but skin left on. 1/2 teaspoon kosher salt Instructions 1 Skewer the onion through the root end; if you have an extra spit fork, use it to secure the onion to the spit. Then spit and secure the main course. 2 Be sure to test that your food freely fits and spins on the rotisserie. It is crucial to test this out before you preheat the grill. 3 Set the grill up for indirect high heat (450° to 550°F) with the drip pan in the middle of the grill. 4 Put the spit on the grill, start the motor spinning, and make sure the drip pan is centered beneath the main course. Close the lid and cook until the onion is blackened on the outside and tender all the way through, about 1 hour. 5 Remove the onion from the rotisserie spit. Be careful - the spit and forks are blazing hot. Cut the blackened skin away from the onion and discard. Dice the cooked onion, sprinkle with salt, and

Backyard Tabletop S’mores

Image
Line a terracotta pot with foil, add charcoal and voila... backyard tabletop S’mores ! Directions: Roast one large Marshmallow slowly over a fire. Place half a Hershey's Milk Chocolate Bar on a Honey Maid Graham Cracker and then put the roasted marshmallow in the middle. Top with the other graham half.

Grilled PB & J

Image
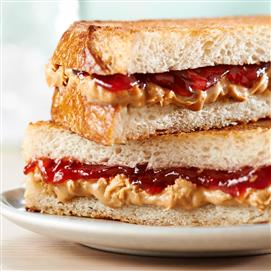
Grilling PB & J is the way to go! A big glass of cold milk is mandatory! Ingredients: Extra Crunchy Peanut Butter Strawberry Jam 2 slices bread Directions: Preheat the grill to about medium (about 350°F to 400°F). Spread peanut butter and jam on bread. Press together to form sandwich. When the grill is ready place the sandwich directly over the heat and cook for about 1 to 2 minutes per side or until browned. Recipe adapted from JIF

Cookies On The Grill

Image
You can bake outdoors as effectively as baking in a traditional oven. It just takes a little practice. Who knew? From Weber Nation : It’s time to take your baking skills to another level. You can make cookies on the grill? Absolutely ! This is one of my favorite desserts to make. Not only are chocolate chip cookies a classic, they are easy to grill. This gives me the chance to bring the cozy feeling of milk and cookies outside on a cool summer night.  Prepare your favorite cookie dough and then follow my tips below for taking it to the grill!   1. You are going to be cooking over indirect medium heat, so preheat your grill for 10-15 min then turn it down to 350 degrees. 2. Place your cookies on a cookie sheet.  3. Once your grill is back at 350 degrees, put your cookie sheet in the center of the grill, over indirect heat. 4. Close the lid and set your timer for about 12-15 minutes, depending on how crispy you like your cookies. Side note: even though the cookies are starting to

Bacon Wrapped Sausage

Image
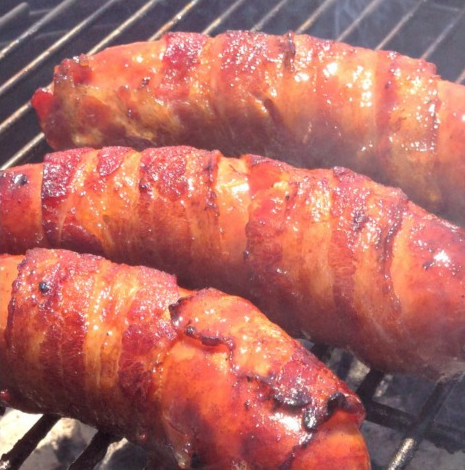
Sweet and very savory, this irresistible recipe features sausage nestled in strips of bacon covered with All-Purpose Rub . Ingredients 10 Sausages Bacon slices (one slice per sausage) All-Purpose Rub Directions: Wrap each sausage in a strip of bacon. Place the sausage on the bacon at one end. Roll the bacon and sausage around and around until the bacon covers the sausage. Season each sausage evenly with the rub. Cover and refrigerate for 2 to 4 hours. Preheat grill to medium-high (about 400°F to 450°F) using a two-zone fire . You can add wood chunks or chips to the coals after the grill is heated. When grill is ready place the sausages over indirect heat and grill. Rotate the sausages every 10 minutes. The whole process should take 30 to 40 minutes. The internal temperature of the sausage should be about 165 degrees when ready. Usually if they are firm, they are done. Let rest for 5 to 10 minutes. Serve on a good sandwich roll.

Cornish Game Hen on the Grill

Image
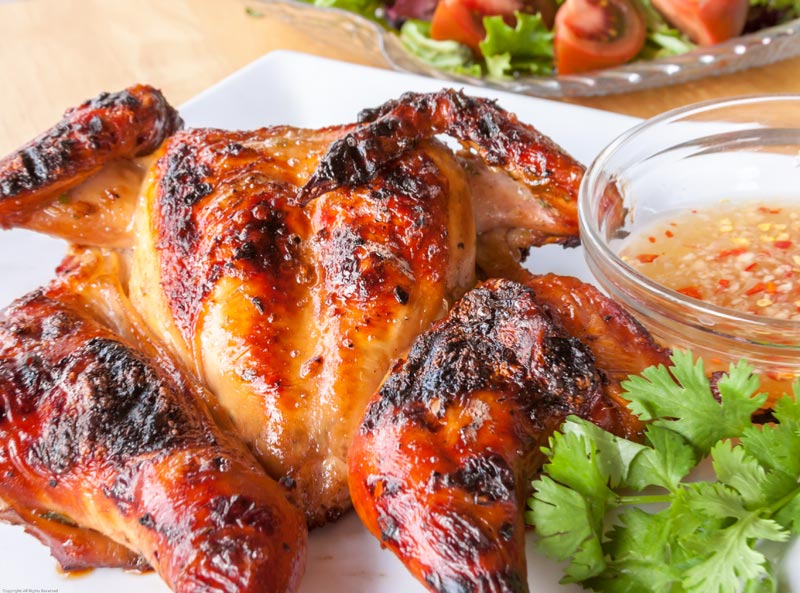
This simple recipe produces chicken that is extremely juicy with crispy skin. Absolutely delicious! Ingredients: 1 cup olive oil 1/2 cup lemon juice 2 tablespoons minced garlic 1 tablespoon lemon zest 1 tablespoon chopped rosemary 1 tablespoon chopped thyme 1 tablespoon chopped parsley Pinch crushed red pepper 2 Cornish game hens, about 1 1/4 pounds each 1 teaspoon salt 1/2 teaspoon fresh ground white pepper Directions: In a small mixing bowl, combine the olive oil, lemon juice, garlic, lemon zest, rosemary, thyme, parsley, and crushed red pepper. Mix to combine and set aside. Spatchcock the Chicken Place the hens on a cutting board. With a boning knife, cut along the backbone and remove. Place the hens breast-side down and using the heel of your hand, push down to break the breastbone and flatten. Tuck the wing tips behind the joint of the wing that meets the breast. Place in a 9 by 13-inch, non-reactive baking dish and add the marinade. Refrigerate for at least

How to Grill Vegetables Like a Pro

Image
Move over meat! Vegetables take center stage in this guide to perfect, healthy, tasty grilling. Vegetables come to life on the grill. Heat works to caramelize the natural sugars and juice in vegetables; combined with smoky grill flavor they equal mouthwatering taste. In fact, once you grill vegetables, you’ll never want to return to frozen, microwaved versions that lack taste and texture. Here are the basics of grilling delicious vegetables. Source: Fix.com

Grilled Doughnuts

Image
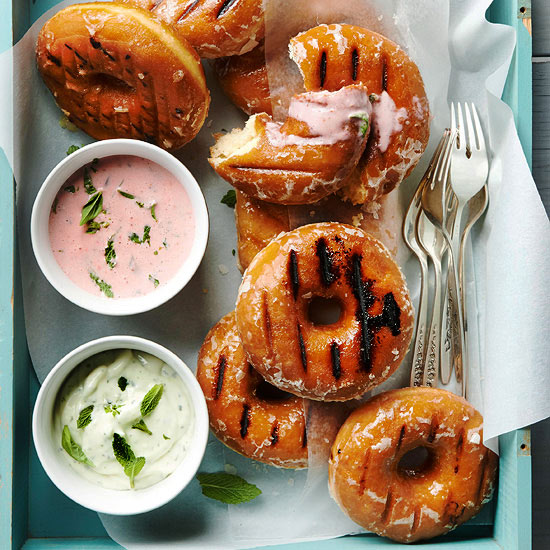
Something that you never thought of from Better Homes & Gardens . Grilled Doughnuts Ingredients: 8 glazed doughnuts Nonstick cooking spray 1 recipe Mint Julep Dip 1 recipe Strawberry Basil Dip Directions: Heat charcoal or gas grill to medium-low. Coat doughnuts with cooking spray. Grill doughnuts, covered, until lightly browned, 30 seconds to 1 minute per side. Watch closely to avoid burning. Serve grilled doughnuts with Mint Julep Dip and Strawberry Basil Dip. Strawberry Basil Dip Ingredients: 6 ounces fresh strawberries, hulled (about 1 1/4 cups) 4 ounces cream cheese, softened (1/4 cup) 3 tablespoons honey 1 tablespoon packed fresh basil leaves Directions: In a blender or small food processor combine strawberries, cream cheese, and honey. Cover; blend or process until smooth, stopping to scrape down sides as necessary. Add basil; pulse until just chopped. Serve immediately. Mint Julep Dip Ingredients: 6 tablespoons sugar 1 tablespoon packed fresh mint

Grilled Crispy Bacon

Image
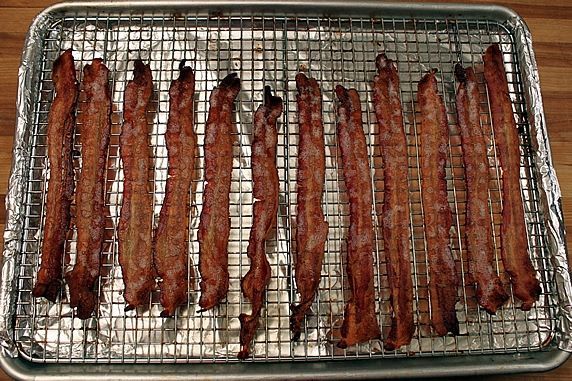
Making perfect crispy bacon on the grill is really easy and takes almost no effort. Follow these instructions and you’ll have perfect crispy bacon every time. Ingredients: Bacon (Any kind and as much as you need) Directions: Preheat the grill to about medium-high (about 400°F to 450°F). Lay out the bacon on a baking tray. Make sure that the pieces aren't overlapping. When grill is ready place the baking tray on the grill over direct heat and close the lid. Cook for 15 minutes or until crispy. Remove from the grill and serve.

Spiral Grilled Hot Dogs

Image
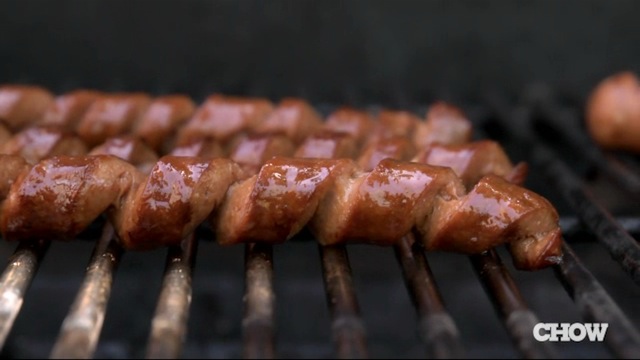
Kick your grilled hot dogs up a notch, by spiral cutting them! They will cook perfectly straight and you will boost the surface area so you get more of that nice grilled flavor. Also once it's on the bun there are plenty of nooks and crannies for relish and other toppings to fit into. CHOW.com's Blake Smith shows how the simple technique of cutting a spiral pattern into your hot dog before grilling it will not only improve the wiener-eating experience, but will also transform the dog into a conversation starter. via

The Finger Test to Check the Doneness of Meat

Image
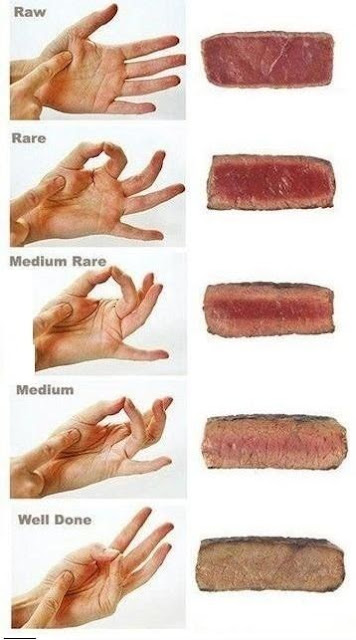
How to determine steak tenderness just by using your hand. There are two basic methods to test for how done your meat is while you are cooking it—use a meat thermometer, or press on the meat with your fingertips. The problem with the meat thermometer approach is that when you poke a hole into the meat with a thermometer, it can let juices escape, juices that you would rather have stay in the meat. For this reason, most experienced cooks rely on a “finger test” method, especially on steaks (whole roasts are better tested with a thermometer). My mother has been trying to get me to test meat with my fingertips for years, and for years, being somewhat of a scaredy cat (won’t it burn my fingers?) I ignored, avoided, ran away from the idea. Then my friend David showed me up. Here’s a guy who loves to grill but doesn’t know how to boil water. (Really. Cannot boil water. Just ask him, he’s proud of the fact.) David taught me how to test for the doneness of meat using this method and thes

Bacon Wrapped Hot Dogs

Image
Image credit Manteresting There is no easier and better way to utilize bacon on the grill. Ingredients: Hot dogs (All beef) Bacon slices (one slice per hot dog) Directions: Preheat the grill to about medium-high (about 400°F to 450°F). Wrap each hot dog in a strip of bacon. Place the hot dog on the bacon at one end. Roll the bacon and hot dog around and around until the bacon covers the whole hot dog. When grill is ready place the hot dogs over indirect heat and grill. Rotate the dogs every 4 to 5 minutes. The whole process should take about 20 minutes. Serve on a good hot dog roll with coleslaw, cheese, mustard, onions, relish or whatever other condiments you enjoy.

Scoring Your Steak

Image
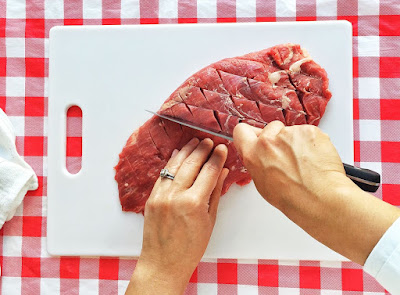
This trick changes EVERYTHING. For more evenly-cooked, tender, and flavorful steaks off the grill, try scoring your meat! You heard us right: That method you usually apply to your holiday ham and duck breasts can also be used on your steak. HERE'S HOW: Using the tip of a sharp knife, first make shallow (about 1/8 inch deep) cuts across the grain one way, then the other way (perpendicular to first set of cuts). Repeat on the other side. Season the steak, then grill it on medium-high for a minute or two less per side. WHY BOTHER, YOU ASK? Well, if you like rubbing your steaks down with spices, garlic, or herbs, this trick makes sure the flavor sets in because you can really cram the seasoning into the cuts. The shallow cuts also give the heat from your grill easier access, thereby minimizing that dreaded, dry, gray line that can sometimes appear around the perfectly juicy, medium-rare band in the center of your steak. Read more...

Grilled Eggplant

Image
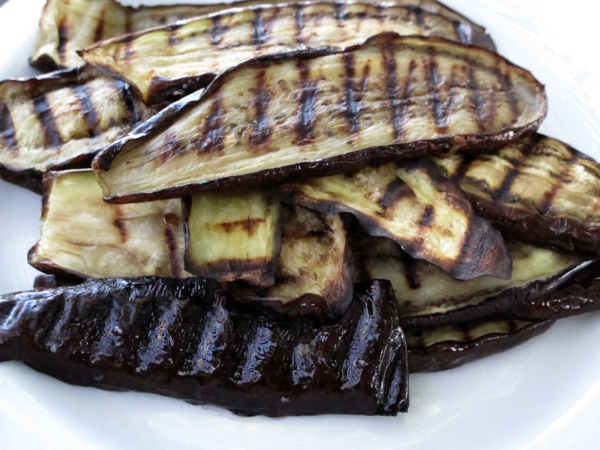
This is an amazingly easy recipe and ever so savory! Ingredients: 4 Japanese eggplants sliced lengthwise Extra Virgin Olive Oil Salt Pepper Garlic Powder Directions: Rinse and dry the eggplants. Slice them into 1/2 inch thick pieces. Combine eggplant slices, extra virgin olive oil, salt, pepper and garlic powder in a large shallow baking dish and mix well. Let sit at room temperature for at least 1 hour before grilling. Heat the grill to about medium-high (about 400°F to 450°F). When the grill is ready, place the eggplant slices directly over the coals and grill until golden-brown grill marks form. About 3 to 4 minutes. Turn the eggplant and grill until tender and well marked on the second side, 3 to 4 minutes more. The interior should be grayish and soft rather than white and hard. Serve warm or at room temperature.

Grilled Country-Style Pork Ribs

Image
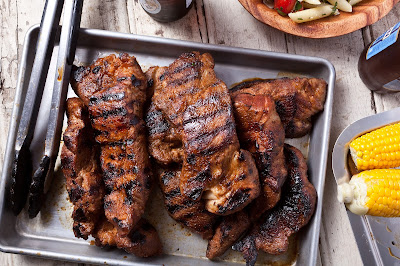
Country-style pork ribs, which come in both boneless and bone-in varieties, are meaty enough to cook like pork chops with a few minutes on a hot grill. Ingredients: 3 1/2 pounds country-style pork ribs Extra Virgin Olive Oil Salt Pepper Garlic Powder Directions: Season the Country-style pork ribs with extra virgin olive oil, salt, pepper and garlic powder. Let the ribs sit at room temperature for 1 hour before grilling. Heat the grill to medium (about 350°F to 450°F). Place the ribs on the grill with the larger, flatter side down, cover the grill, and cook until the pork is browned on the bottom, about 5 to 7 minutes. Flip, cover, and cook until they are browned on the other side, about 5 to 7 minutes more. Rotate the ribs so that they are resting on a thinner side (you may need to prop them up against one another), cover, and cook until browned, about 4 to 6 minutes. Flip to the other thinner side, cover, and cook until browned or an instant-read thermometer inserted

When To Put The Lid On

Image
An excellent explanation on when to cook with the lid on. Most grills come with lids. And a good thing, too. A lid is essential for most outdoor cooking. You can cook on a lidless grill, but you will be severely handicapped. It would be like doing all your cooking on a stovetop. With a lid, most of the heat comes from below, but much of it goes right past the food and is reflected from above so your grill becomes an oven and you can cook foods with heat from all sides. This significantly reduces the risk of burning dinner. A lid also traps smoke, moisture, and flavor molecules. In short, it gives you much more versatility. And let's not forget, it keeps flies off the food. As a rule of thumb, if the food is 3/4" or less, no lid. Leave the lid off when you are cooking thin foods like or skirt steak. Without a lid, all the heat comes only from underneath. One side cooks, the other does not. For something like skirt steak we want a dark exterior loaded with the compounds f

Grilled Boneless Beef Chuck Short Ribs

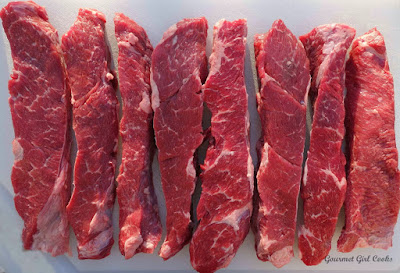
Image
Boneless beef chuck short ribs may be the best inexpensive cut of steak for the grill. Ingredients: Boneless beef chuck short ribs from Costco (about 3/4 of an inch thick) Extra Virgin Olive Oil Salt Pepper Garlic Powder Directions: Preheat the grill. Season short ribs with extra virgin olive oil, salt, pepper and garlic powder. Sear ribs on first side on medium high for 3 minutes each side turning at 1.5 minutes for cross hash marks. Sear ribs on second side on medium high for 2 minutes each side turning at 1 minute for cross hash marks. Ribs are done when a thermometer inserted into thickest part of steak reads 125°F. Let rest for 10 minutes before serving.

Perfect Burger

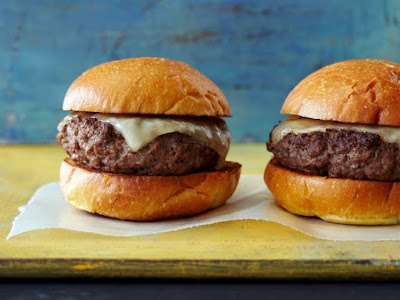
Image
Bobby Flay , TV chef and grill master, shares his recipe for the perfect burger. Total Time: 20 min Prep: 10 min Cook: 10 min Yield: 4 servings Level: Easy Ingredients: 1 1/2 pounds ground chuck (80 percent lean) or ground turkey (90 percent lean) Sea salt and freshly ground black pepper 1 1/2 tablespoons olive oil 4 slices cheese (optional) 4 hamburger buns, split; toasted, if desired Directions: Divide the meat into 4 equal portions (about 6 ounces each). Form each portion loosely into a 3/4-inch-thick burger and make a deep depression in the center with your thumb. Season both sides of each burger with salt and pepper. IF USING A GRILL: Heat a gas grill to high or heat coals in a charcoal grill until they glow bright orange and ash over. Brush the burgers with the oil. Grill the burgers until golden brown and slightly charred on the first side, about 3 minutes for beef and 5 minutes for turkey. Flip over the burgers. Cook beef burgers until golden brown and

Popular posts from this blog

The Hollow Earth: The Greatest Geographical Discovery In History Made By Admiral Richard E. Byrd

In 2013 Obama Legalized The Use Of Propaganda On The US Public

The Time Bill Clinton Threatened Peter Jennings "You Don't Want To Go There Peter!"